总想有点地方写一些杂碎的东西,今天抽了一会功夫搭了个ghost博客。我会在这里写一些比较零碎的学习笔记之类的东西。我们首先说一下该博客的搭建过程。
其实ghost搭建起来很简单,一个docker-compose.yaml文件就解决了。也正是由于它的简单,搭建起来不费时间,后台写博客方便等等,我才使用它。 话不多说 ,我们开始。
整体架构
- ghost + docker
- nginx
- 七牛
- disqus
Ghost
我是使用docker-compose运行ghost的,所以你首先需要安装docker以及docker-compose. 至于docker以及docker-compose怎么安装,这里就不说了,自行Google。
我的docker-compose是这么写得:
version: '3'
services:
    ghost:
        image: ghost:2.0.3-alpine
        ports:
            - "2368:2368"
        restart: always
        volumes:
            - ./content:/var/lib/ghost/content
            - ./config.production.json:/var/lib/ghost/config.production.json
        environment:
            - url=https://netcj.com
        ulimits:
            nofile: 65535
直接docker-compose up -d 即可启动一个ghost服务。
你一定注意到一点,容器卷中,我将容器的配置config.production.json暴露出来了。该文件基本内容如下:
{
  "url": "http://netcj.com",
  "server": {
    "port": 2368,
    "host": "0.0.0.0"
  },
  "database": {
    "client": "sqlite3",
    "connection": {
      "filename": "/var/lib/ghost/content/data/ghost.db"
    }
  },
  "mail": {
    "transport": "Direct"
  },
  "logging": {
    "transports": [
      "file",
      "stdout"
    ]
  },
  "process": "systemd",
  "paths": {
    "contentPath": "/var/lib/ghost/content"
  }
}
这里配置了服务的域名,端口,数据库等。
我这里用的数据库是sqlite3,我觉得一个小博客系统够了,mysql太重了。
Nginx
博客系统已经跑起来了,现在我们需要一个nginx服务,关于nginx的安装你可以看这里。
我的nginx配置如下:
server {
    listen                       443 ssl  http2 default fastopen=3 reuseport;

    server_name                  netcj.com www.netcj.com;
    server_tokens                off;

    access_log                   /www/nginx/logdata/netcj.com.log;

    include                      /www/nginx/ip.blacklist;

    ssl_trusted_certificate      /www/nginx/certs/ca_file.pem;
    ssl_certificate              /www/nginx/certs/*.netcj.com_rsa.cer;
    ssl_certificate_key          /www/nginx/certs/*.netcj.com_rsa.key;
    ssl_certificate              /www/nginx/certs/*.netcj.com_ecc.cer;
    ssl_certificate_key          /www/nginx/certs/*.netcj.com_ecc.key;
    ssl_dhparam                  /www/nginx/dhparams.pem;
    ssl_ecdh_curve               X25519:P-256:P-384:P-224:P-521;
    ssl_ciphers                  TLS13-AES-256-GCM-SHA384:TLS13-CHACHA20-POLY1305-SHA256:TLS13-AES-128-GCM-SHA256:TECDH+CHACHA20:EECDH+CHACHA20-draft:EECDH+AES256:RSA+AES256:EECDH+3DES:RSA+3DES:!MD5;

    ssl_prefer_server_ciphers    on;
    ssl_protocols                TLSV1.1 TLSV1.2 TLSV1.3;
    ssl_session_cache            shared:SSL:50m;
    ssl_session_timeout          1d;
    ssl_session_tickets          on;
    ssl_stapling                 on;
    ssl_stapling_verify          on;
    resolver                     114.114.114.114 8.8.8.8 valid=300s;
    resolver_timeout             10s;


   # webmaster 站点验证相关
    location ~* (google4c90d18e696bdcf8\.html|BingSiteAuth\.xml)$ {
        root                     /www/static;
        expires                  1d;
    }


    add_header               Public-Key-Pins 'pin-sha256="Vjs8r4z+80wjNcr1YKepWQboSIRi63WsWXhIMN+eWys="; pin-sha256="YLh1dUR9y6Kja30RrAn7JKnbQG/uEtLMkBgFF2Fuihg="; pin-sha256="S4AbJNGvyS57nzJwv8sPMUML8VHSqH1vbiBftdPcErI="; pin-sha256="MunFWpgz45SKZDTvitbhyy0Vu9Axb6CHIdM9R7DXFjs=";pin-sha256="qiYwp7YXsE0KKUureoyqpQFubb5gSDeoOoVxn6tmfrU="; max-age=2592000; report-uri="https://netcj.report-uri.com/r/d/hpkp/enforce"';

    add_header               Strict-Transport-Security "max-age=31536000; includeSubDomains; preload";
    add_header               X-Frame-Options deny;
    add_header               X-Content-Type-Options nosniff;
    add_header               Expect-Ct 'enforce,max-age=30,report-uri="https://netcj.report-uri.com/r/d/ct/enforce"';
    add_header               Referrer-Policy "origin-when-cross-origin";


    add_header               Cache-Control no-cache;
    add_header               X-Via AQ;
    add_header               X-XSS-Protection "1; mode=block";


    location / {
        proxy_http_version       1.1;

        proxy_ignore_headers     Set-Cookie;
        proxy_hide_header        Vary;
        proxy_hide_header        X-Powered-By;

        proxy_set_header         Connection       "";
        proxy_set_header         Host             netcj.com;
        proxy_set_header         X-Real-IP        $remote_addr;
        proxy_set_header         X-Forwarded-For  $proxy_add_x_forwarded_for;
        proxy_set_header         X-Forwarded-Proto $scheme;

        proxy_pass               http://127.0.0.1:2368;
    }
}

server {
    server_name                  netcj.com www.netcj.com;
    server_tokens                off;

    access_log                   /dev/null;

    if ($request_method !~ ^(GET|HEAD|POST|OPTIONS)$ ) {
        return                   444;
    }

    # letsencrypt file verify
    location ^~ /.well-known/acme-challenge/ {
        alias                    /www/nginx/challenges/;
        try_files                $uri =404;
    }

    location / {
        rewrite                  ^/(.*)$ https://netcj.com/$1 permanent;
    }
}
七牛
ghost默认图片等静态文件都放在服务器上,一方面耗费流量,一方面我的服务器是小水管,加载太慢,考虑将图片放到七牛云。
ghost官方也有相关文档
这里我们首先要添加一个插件qn-store。
$ cd ghost文件夹
$ mkdir -p content/adapters/storage
$ cd content/adapters/storage
$ git clone https://github.com/Minwe/qn-store.git
然后我们需要修改config.production.json文件,添加以下内容:
"storage": {
    "active": "qn-store",
    "qn-store": {
      "accessKey": "xxxx",
      "secretKey": "xxxx",
      "bucket": "xxxx",
      "origin": "https://xxxx",
      "fileKey": {
        "safeString": true,
        "prefix": "/YYYYMM/"
      },
      "uploadURL": "up-z2.qiniup.com"
    }
  },
其中需要关注的是:
- accessKey\secretKey 七牛的授权密钥
- bucket 七牛存储空间名
- origin 七牛绑定的空间域名
- prefix 上传文件的前缀
- uploadURL 七牛上传的地址,各个地区不一样,我这里是华南的。
配置好这些之后,docker-compose restart 即可。
disqus
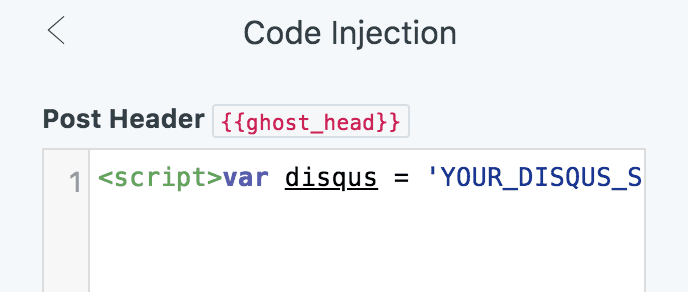
disqus各个主题的支持方式应该有所不同,该主题(attila)只要在发博客时,博客头部插入<script>var disqus = 'YOUR_DISQUS_SHORTNAME';</script> 即可。

邮箱设置
我设置的QQ邮箱,QQ 邮箱需要使用 授权码 代替密码才能登陆(邮箱独立密码也无法登陆)。
授权码生成地址: 设置 > 账户 > POP3/IMAP/SMTP/Exchange/CardDAV/CalDAV服务 。
修改config.production.json文件,添加以下内容:
"mail": {
  "from": "<邮箱,需要与下面的邮箱一致>",
  "transport": "SMTP",
  "options": {
    "service": "QQ",
    "auth": {
      "user": "<邮箱>",
      "pass": "<授权码>"
    }
  }
},
最后
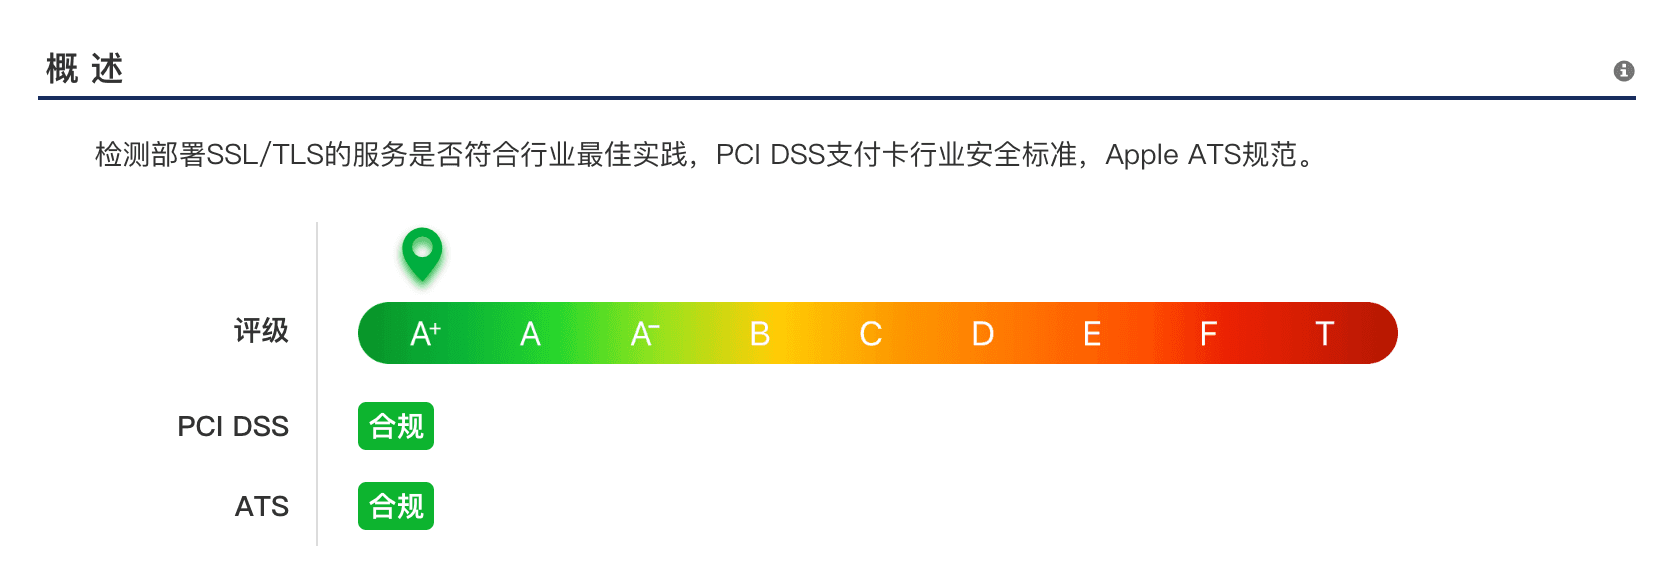
到myssl.com 检测以下网站配置是否安全。A+ 还不错。

如果你没有证书,可以到这里申请免费证书。
如果有问题,请留言,我们一起解决。